
#PASTELCRAFTCLUB // Apricot Rose Jam with Kitten and the Bear
Are you ready for more #pastelcraftclub? Good, because this week we have something pretty extra special in order.
Our dear friend Sophie, aka the jam genius behind Kitten and the Bear, is sharing an Apricot Rose Jam recipe with us featuring all of her top secret tips and tricks for making the perfect confiture. Alyssa and I have both been swooning over Kitten and the Bear since the very day they opened their shop doors, and we can pretty much promise you've never tasted jam quite this good before. Everything Sophie and her marvellous husband Bobby touch truly turns to gold, and we're absolutely thrilled to be able to share a special recipe from their shop of wonders.
Just make sure you don't forget their secret ingredient: LOVE!


INGREDIENTS
5 lb apricots of any variety, pit removed (we used small yellow Pattersons, about 45-50 apricots)
2 lb sugar
4 oz freshly squeezed lemon juice (about 2 lemons worth)
A small handful of food-grade dried rose petals
SUGGESTED EQUIPMENT
Traditional Mauviel copper confiture pan (available by special order through Kitten and the Bear) or wide double-bottomed stainless steel pot
Home canning kit

METHOD
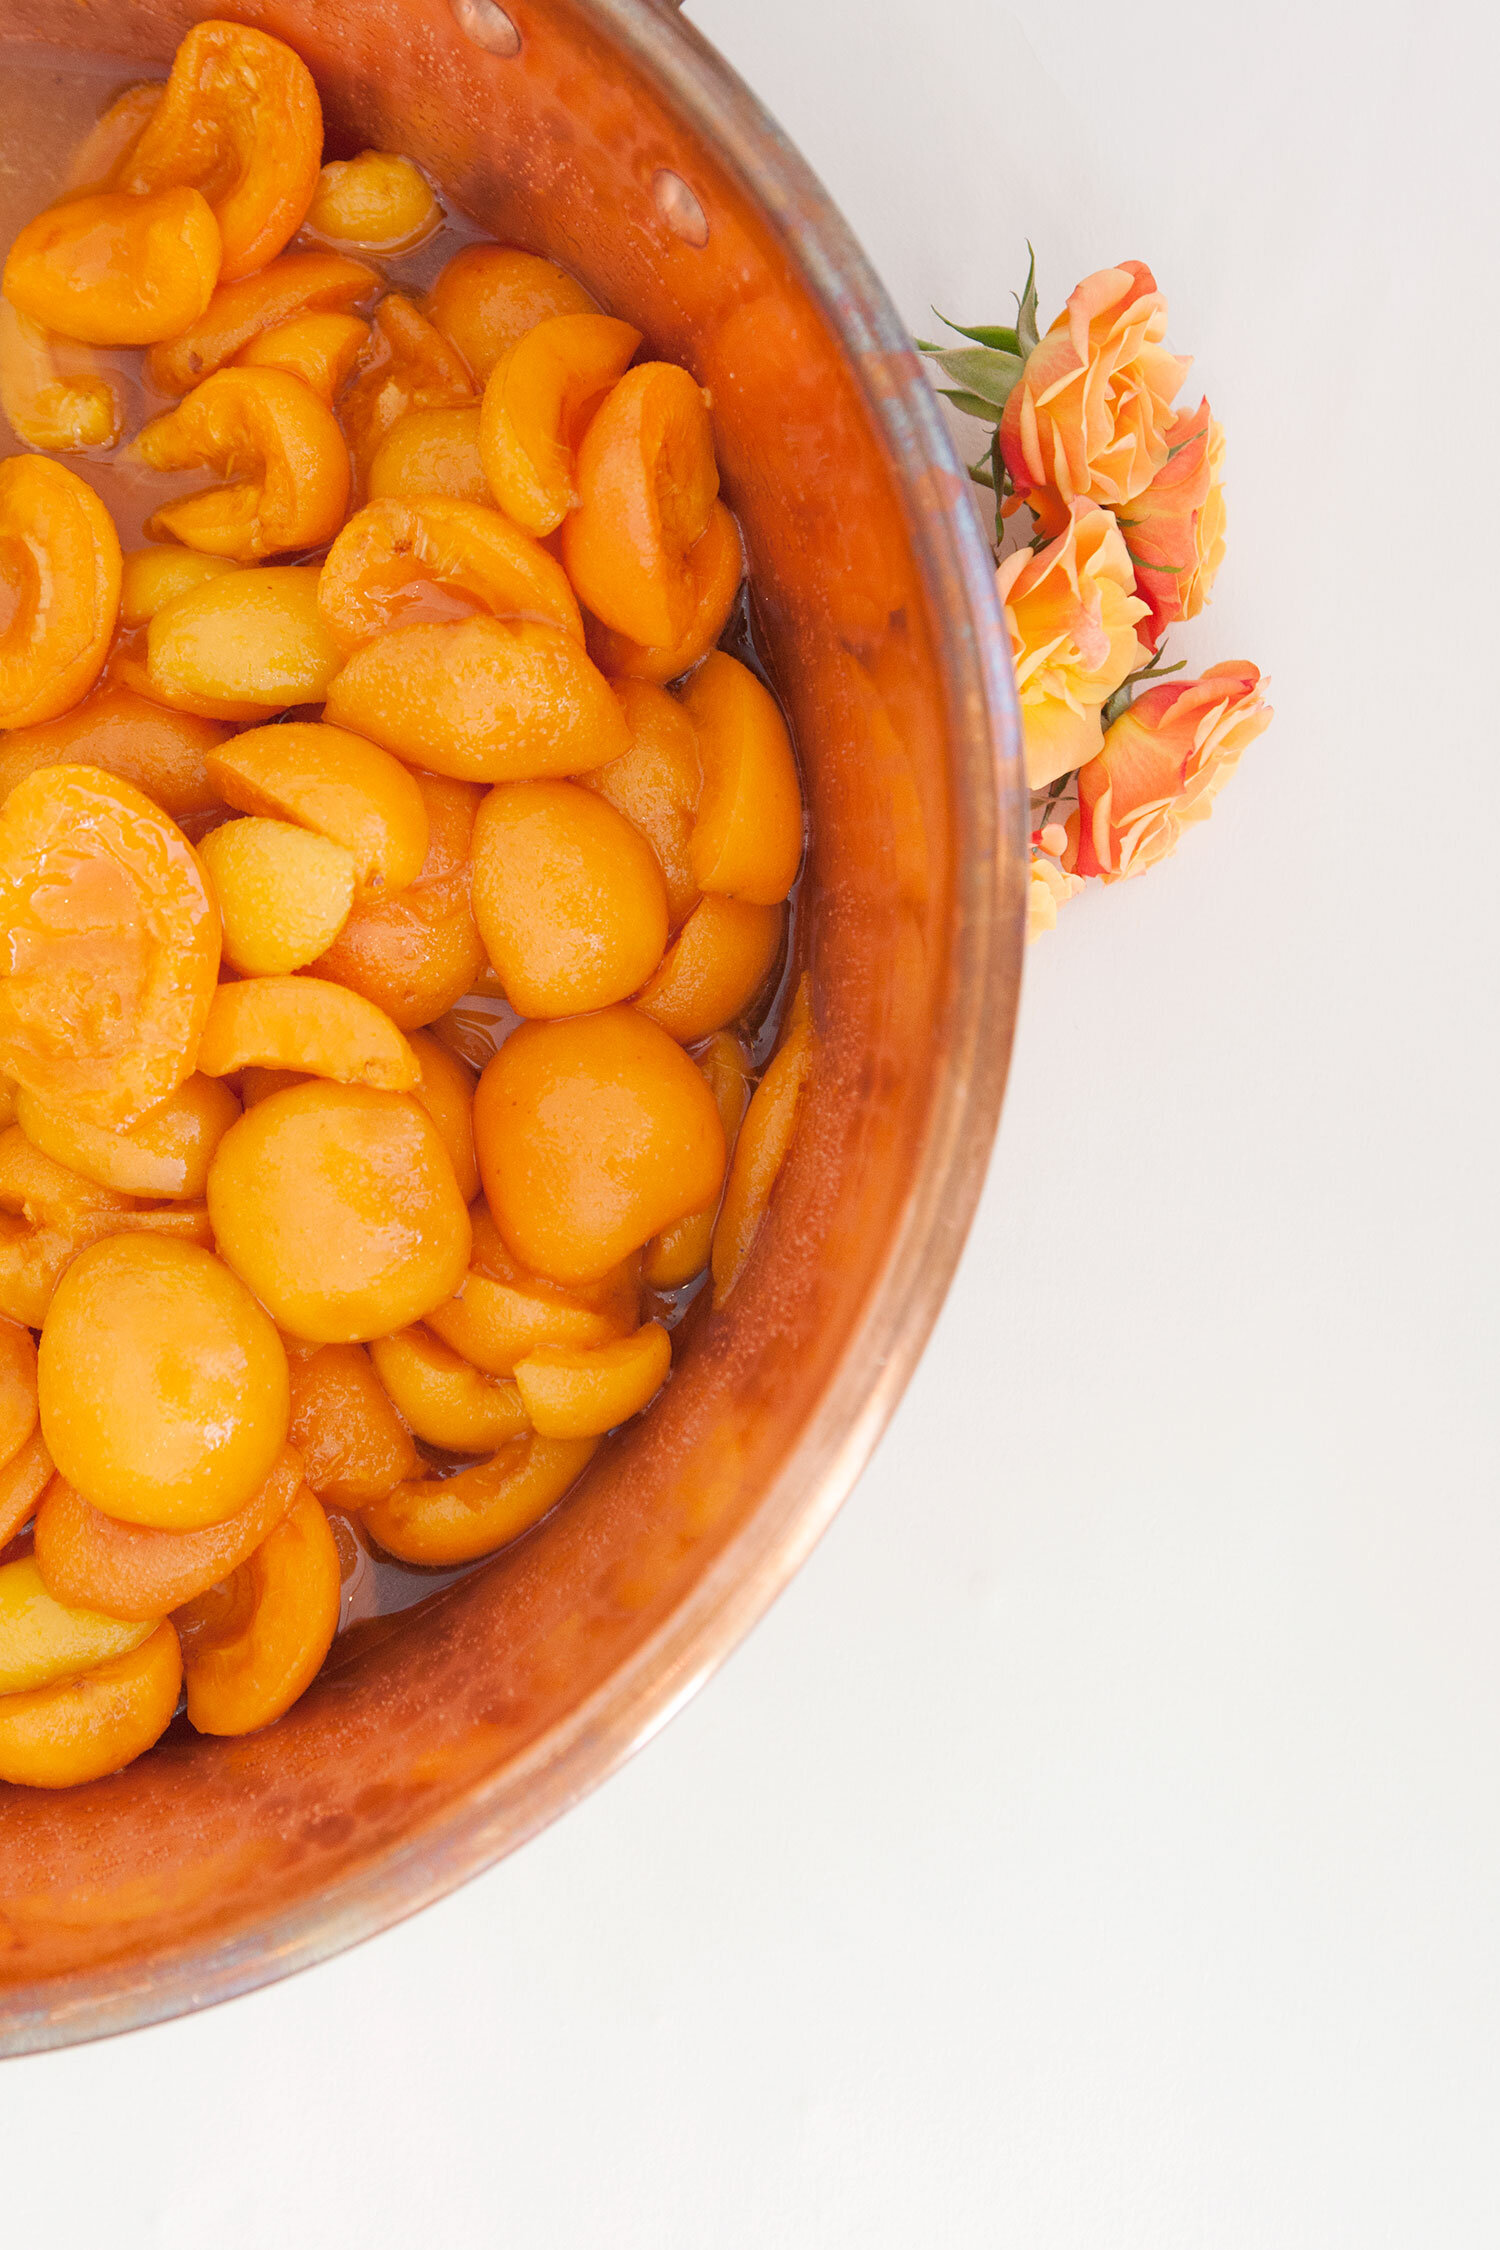
Day 1 // Wash, then slice your apricots in half and remove the stone from the center. We left our apricots in halves, but if you have larger, firmer fruit, you can cut once again in half to make 4 cubes.
Add the apricots, sugar, and freshly squeezed lemon juice to a non-reactive mixing bowl, toss thoroughly, and cover.
Allow to sit in the refrigerator overnight.


Day 2 // Line a clean baking sheet with clean, dry jam jars, and put into a 250 F oven.
Transfer your apricot mixture into a traditional copper jam pan, or wide stainless steel pot (do not use aluminum, as it will give your jam a dull colour, metallic flavour, and make it difficult for your jam to set).
Heat on high heat, scraping the bottom of the pan every couple minutes to avoid hot spots.
Your jam will come up to a boil and begin to foam. Continue to cook, manipulating the burner heat to be at the highest heat possible without your jam boiling over. The goal with all French style jam making is to have the highest possible heat, the most amount of evaporation, and the shortest time on the stovetop. This results in a brightly coloured preserve with a fresh, fruit forward flavour. Thus, this stage of cooking should only take approximately 20 minutes, depending on your pot choice and stovetop.
The foam will begin to fall, and you will notice that the fruit has started to get soft, puffy, and has begun to break down.
Continue to cook, scraping the bottom of your pot every couple minutes to avoid scorching, however not so often that you don’t allow to jam to come up to temperature and cook on its own.
You will notice that the jam looks more homogenous, and the bubbles are now smaller, and more evenly distributed over the surface of the jam. As your jam gets closer to being done, you may have to reduce your heat slightly or stir slightly more often.
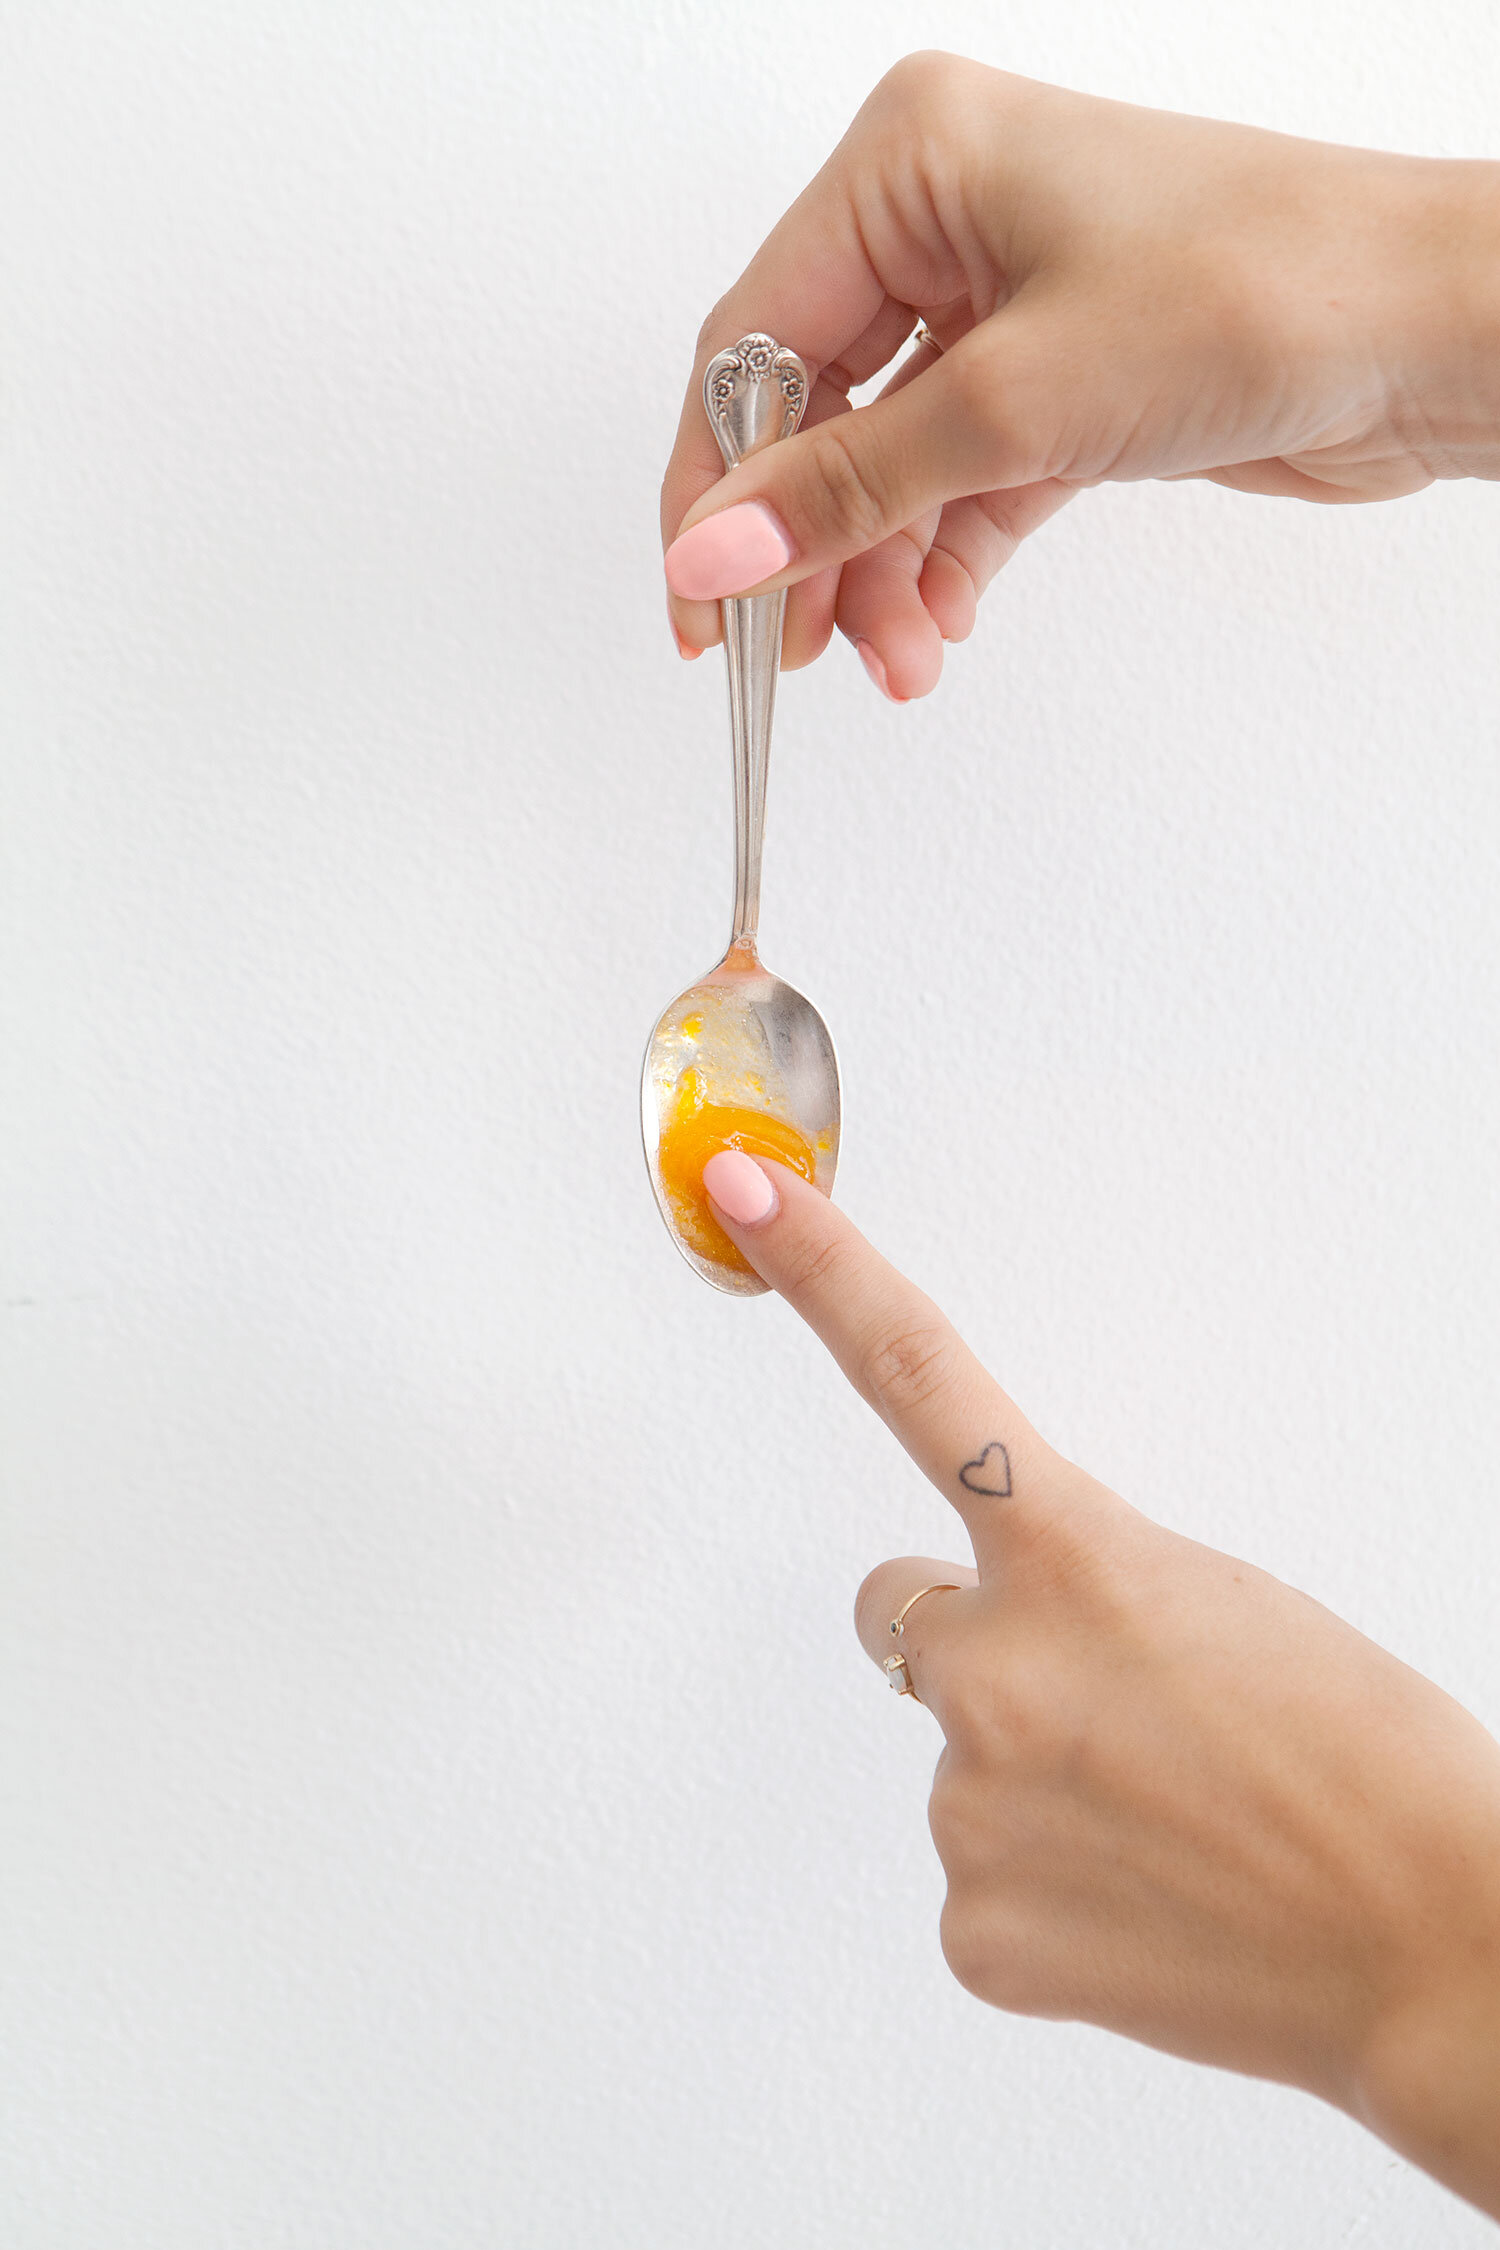
To test for doneness, turn off the heat and scoop a representative sample of jam with a metal teaspoon. Place the spoon in the freezer for approximately 3 minutes, keeping the pot of jam off the heat in the meanwhile. After 3 minutes, gently nudge the preserve with your finger to check the texture, and tip your spoon and see if it runs. You can also push the pot of jam, which has now cooled ever so slightly, with a spoon or spatula to see if a skin has formed. When you lift your spatula out of the jam, it should “sheet” rather than “drip”.
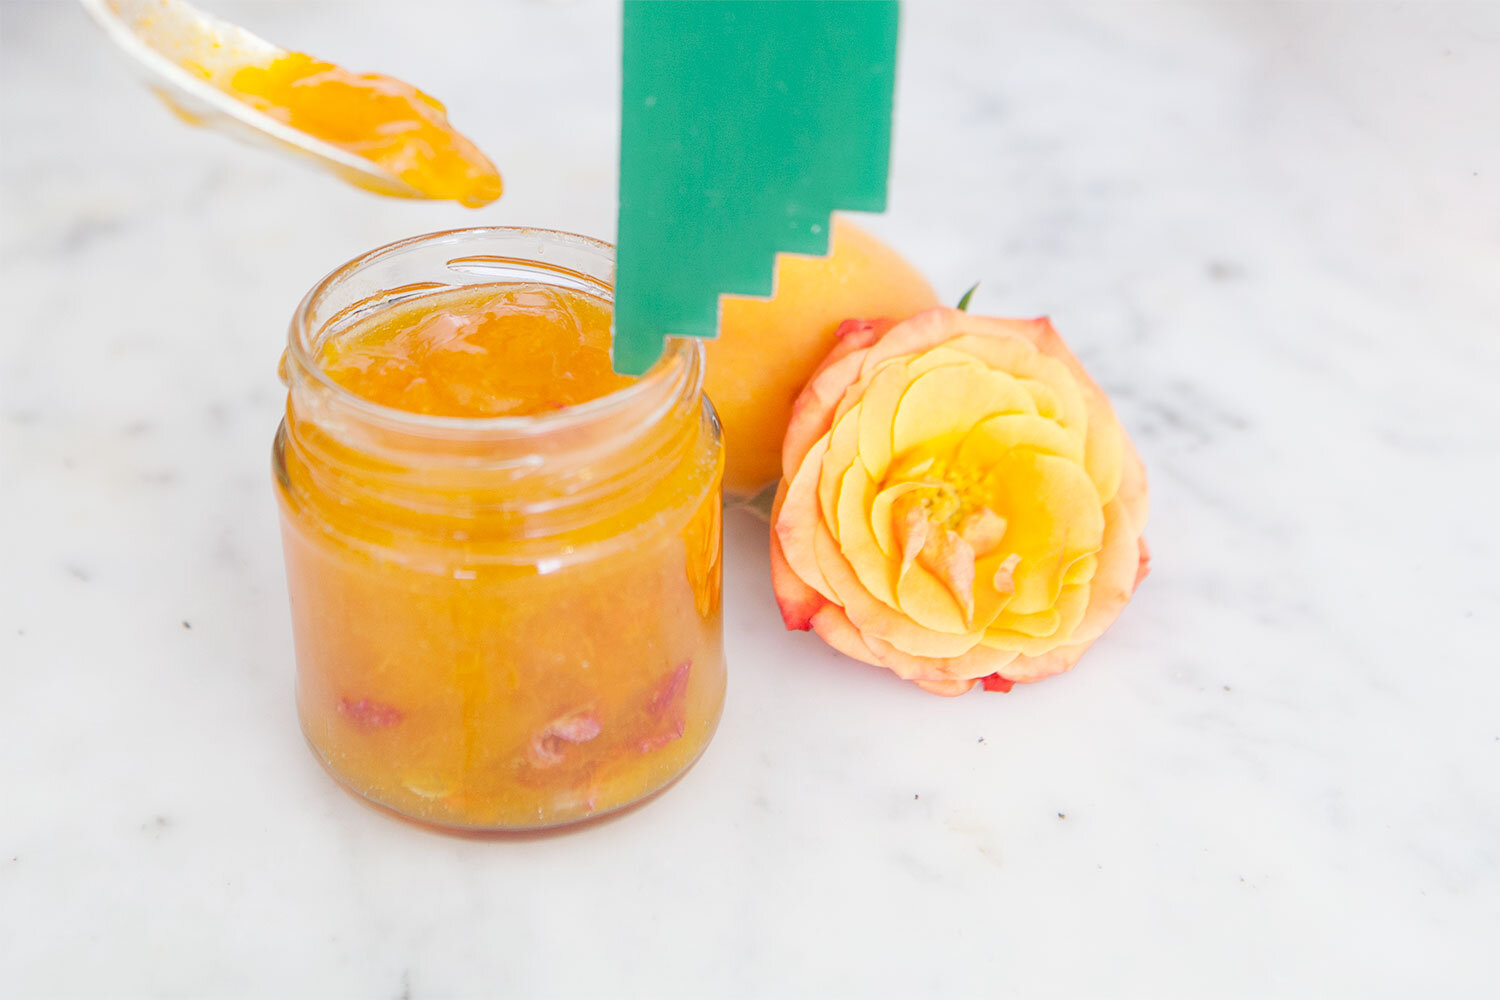
If you feel as though your jam should still be thicker, cook for another 5 minutes and test the jam again. If it is done, skim off any remaining foam and stir in your dried rose petals, adding a little bit at a time to be appetizing and aesthetically appealing.
Remove your jars from the oven, and replace with your caps (set a timer for 10 minutes). Using two heat-safe pitchers, scoop a pitcher full of jam out of your pot with one, and pour directly into the other. Then, use this pitcher to portion out your jam into your sanitary jars. I highly recommend purchasing a standard home canning kit, as a canning funnel and ruler makes this a lot easier.
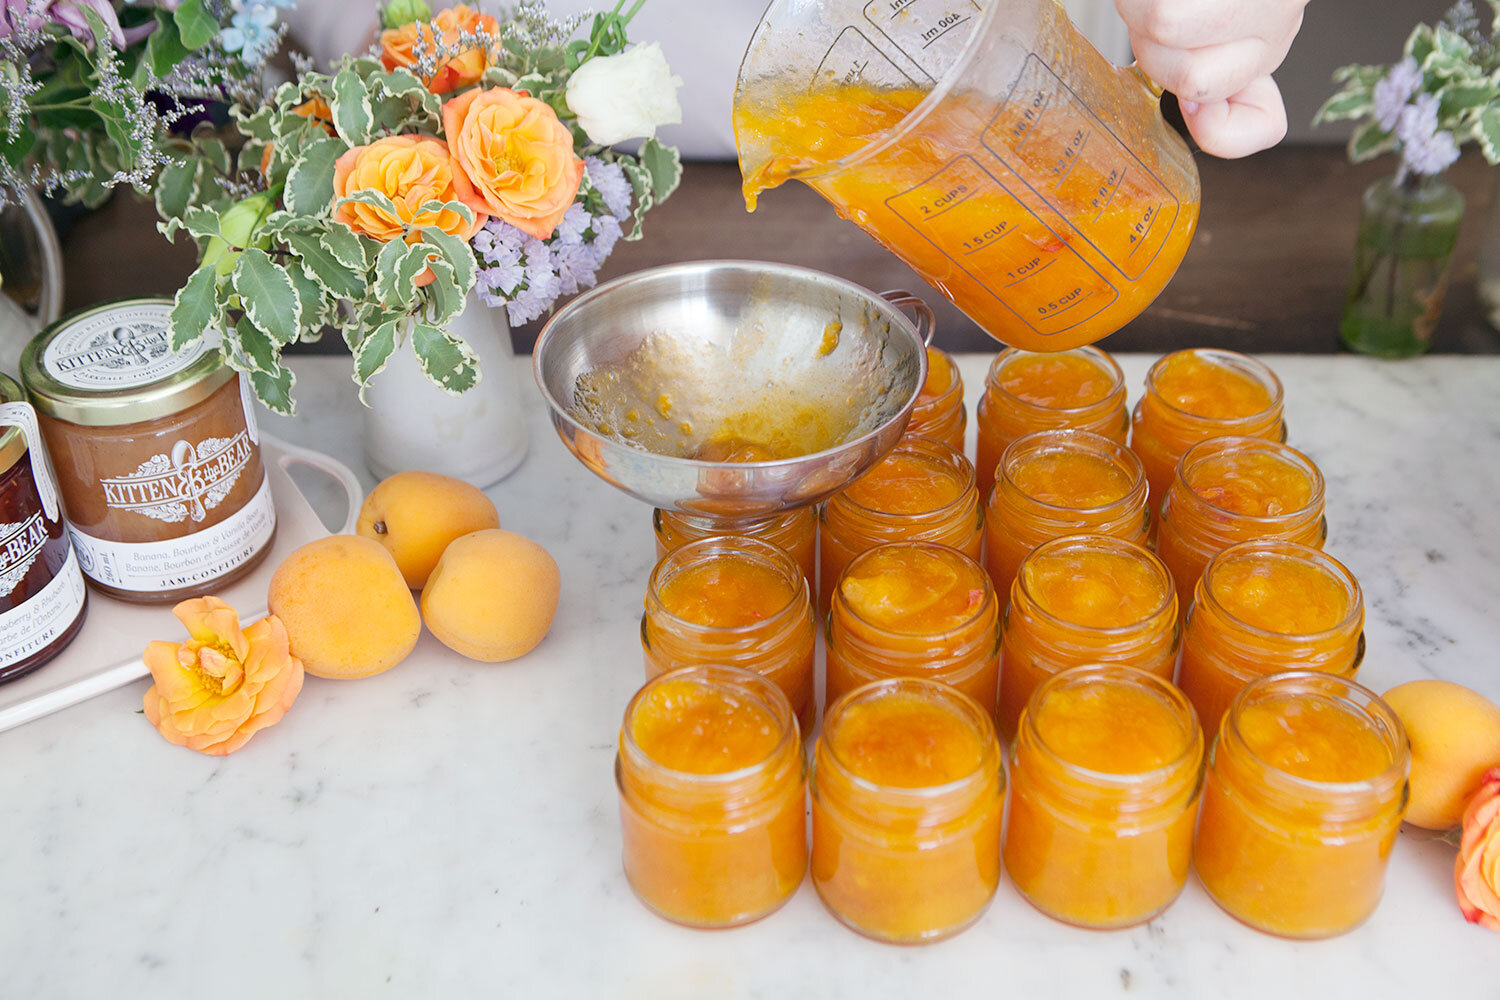
Fill each jam to ¼” of headroom, or the first notch of your headroom gauge. Wet a clean sheet of paper towel with hot water, and ensure there isn’t a single speck on jam on the rim or in the threading of your jars.

Your caps can stay in the oven during this entire process, however ensure that they have been in the oven for at least 10 minutes. Cap all of your jars according to the directions for your specific style of jar (mason or lug), and return to the oven for exactly 10 minutes.
Remove your jars from the oven carefully, space an inch or two apart, and allow to sit undisturbed for 24 hours to ensure a perfect set.
Enjoy! This jam will keep up to 1 year sealed in your pantry (out of direct sunlight), or 3-6 months open in your fridge.

Get creative! Apricot jams pair perfectly with a number of fun flavour embellishments. Some of my favourites are vanilla bean, amaretto, lavender, rose, kirsh, citrus zest (orange, lemon, tangerine), warm spices (cinnamon, allspice, cardamom, anise, nutmeg), brandy, ginger, and saffron. Any spirits, petals, floral waters, zests, extracts and herbs should be added at the very end of cooking, while dried spices (ground or whole) should be added at the beginning to allow for a thorough infusion.

For more Kitten and the Bear goodness be sure to stop into their jam shop in Parkdale, or order online!